Monat: Februar 2012

WordPress Plugin tinymce-templates-lite

15. Februar 2012 - tinymce, wordpress

Hier ist ein kleines Plugin, das der WordPress Konfiguration von tinymce das Template-Plugin  hinzufügt und eure Styles im Dropdown Menü anzeigt.

tinymce-templates

English Summary for „WordPress Plugin tinymce-templates-lite“:

This is a small plugin that extends the WordPress configuration of tinymce with the template plugin and displays your templates in the template dropdown.

Ich brauchte Templates in tinymce und die verfügbaren Plugins waren mir zu umfangreich und zu unpraktisch.

Bei dieser Lösung muss man seine Templates (*.htm oder *.html) nur in den Templates -Ordner des Plugins zu legen und kann sie dann in tinymce verwenden.

Hier ist ein Ausschnitt aus den wichtigsten Codezeilen.

Der Rest des Codes wird benötigt, um die Templates aus dem Ordner auszulesen und im Dropdown darzustellen.

if ( !class_exists( 'tinymce_templates_lite' ) ) {
class tinymce_templates_lite {
function tinymce_templates_lite() {
add_action( 'admin_head',array(&$this, 'tinymce_templates_lite_init'));
}
function tinymce_templates_lite_init() {
if (get_user_option('rich_editing') == 'true') {
add_filter('mce_external_plugins',array(&$this,'add_template_plugin'));
add_filter('mce_buttons',array(&$this,'register_template_button'));
add_filter('tiny_mce_before_init',array(&$this,'nf_tiny_init'));
}
}
public function register_template_button($buttons = array()) {
array_push($buttons, 'seperator','template');
return $buttons;
}
public function add_template_plugin ($plugin_array) {
$plugin_array['template']=plugins_url().'/tinymce_templates_lite/mce_plugins/plugins/template/editor_plugin.js';
return $plugin_array;
}
public function nf_tiny_init ($initArray) {
$tlist=array();
$get_temps=$this->get_templates();
$ww=count($get_temps);
if ($ww > 0) {
for ($i=0; $i<$ww; $i++) {
$expl=explode('.',$get_temps[$i]);
$tlist[]=array('title'=> $expl[0],'src'=>plugins_url().'/tinymce_templates_lite/templates/'.$get_temps[$i],'description' => $expl[0]);
}
$initArray['template_templates']=json_encode($tlist);
}
return $initArray;
}

Download tinymce_templates_lite

tinymce_templates_lite

WordPress + Google Font Faces in Tinymce Editor

7. Februar 2012 - tinymce, wordpress

Zu WordPress als Content Mangement System gehört auch ein Editor, mit dem man Seiten so stylen kann, wie sie später erscheinen sollen.
Wie ich Hintergrundbilder oder Hintergrundfarben im Editor darstelle, habe ich hier schon beschrieben. Jetzt geht es um Google Fonts. Dazu gibt es auch zwei Plugins, um alles mal auszuprobieren.
English summary for „WordPress + Google Font Faces in Tinymce Editor“:
A Short description  how to implement Google Font Faces in your tinymce editor and and plugins for download

Google Font Faces

Ich möchte hier die Schrift ‚Nobile‘ im Editor (wie auch auf dieser Webseite) verwenden.
Ausserdem soll sie im auch noch unter ‚Schriftname‘ ausgewählt werden können.

Der Code des Plugins sieht so aus:
if ( !class_exists( 'tinymce_add_google_fonts' ) ) {
class tinymce_add_google_fonts {
function tinymce_add_google_fonts() {
add_action( 'admin_head',array(&$this, 'tinymce_add_google_fonts_init'));
}
function tinymce_add_google_fonts_init() {
if (get_user_option('rich_editing') == 'true') {
add_filter('tiny_mce_before_init',array(&$this,'nf_add_google_fonts'));
}
}
public function nf_add_google_fonts ($initArray) {
$nf_stylesheet=trailingslashit( get_stylesheet_directory_uri() ) . 'css/editor/editor-style.css';
if (array_key_exists('content_css', $initArray) && !empty($initArray['content_css'])) $initArray['content_css'].=",".$nf_stylesheet;
else $initArray['content_css'] = $nf_stylesheet;
$initArray['theme_advanced_fonts'] = 'Nobile=Nobile,sans-serif;Andale Mono=andale mono,times;Arial=arial,helvetica,sans-serif;Arial Black=arial black,avant garde;Book Antiqua=book antiqua,palatino;Comic Sans MS=comic sans ms,sans-serif;Courier New=courier new,courier;Georgia=georgia,palatino;Helvetica=helvetica;Impact=impact,chicago;Symbol=symbol;Tahoma=tahoma,arial,helvetica,sans-serif;Terminal=terminal,monaco;Times New Roman=times new roman,times;Trebuchet MS=trebuchet ms,geneva;Verdana=verdana,geneva;Webdings=webdings;Wingdings=wingdings,zapf dingbats';
return $initArray;
}
}
$tinymce_add_google_fonts = new tinymce_add_google_fonts();
}

Mit $initArray[‚content_css‘]=… wird eine neue css Datei für den Editor angelegt. Da drin  könnt ihr alles so stylen, wie ihr es wünscht. Die Datei liegt im Plugin unter stylesheets. Man muss an dieser Stelle etwas aufpassen, dass man bereits mit anderen Plugins eingefügte css Dateien nicht überschreibt.

$initArray[‚theme_advanced_fonts‘]=…  enthält alle verfügbaren Schriften. Wenn ihr hier nur die Nobile angebt, ist auch nur noch Nobile im Dropdown vorhanden. Daher sollte man die Standardschriften des Editors hinten anfügen.
Hier ist ein Auszug aus der editor-style.css

@import url("http://fonts.googleapis.com/css?family=Nobile");
body, td, pre {color:#000; font-family:Nobile,sans-serif; font-size:75%; margin:8px;}

Nobile wird als Standard festgelegt und per Import von Google geladen. So funktioniert das auch bei verschiedenen Browsern, weil Google stets die passenden Formate schickt.

Hier ist das Plugin tinymce_add_google_fonts zum Download

tinymce_add_google_fonts

Und hier noch ein Plugin um das Google Font  Nobile im Frontend einzufügen

Nobile

WordPress Plugin für Amazon AWS im Shortcode-Stil

6. Februar 2012 - Amazon, wordpress

Wenn man keinen großen Webshop mit Amazon Produkten auf seiner Webseite eröffnen möchte, kann man sich hier ein Plugin downloaden, mit dem man einzelne Produkte anzeigen und mit dem Amazon AWS experimentieren kann.

English Summary for „WordPress Plugin für Amazon AWS im Shortcode-Stil“:

For your first steps with the Amazon AWS API and single product display on your website you may downlad here a tiny WordPress plugin in shortcode-style. The code is based on Ulrich Mierendorffs Code with slight modifications. It’s displayed below to make shure that there is no modification of your AssociateTag :-).

Man braucht

  1. eine Account bei Amazon
  2. einen AssociateTag für die Region (com,de, fr, …)
  3. eine public key
  4. einen secret Key

Für die Region de ist eine gute erste Adresse http://partnernet.amazon.de

<?php
/*
Plugin Name: shortcode_amazon Plugin
URI: http://www.it-in-a-box.com/
Description: Zeigt Amazon Produkte mit  mit shortcodes an
Author: Norbert Felgendreher Author
URI: http://www.it-in-a-box.com/
Version: 1.1 */

class ShortcodeAmazon {
// constructor:
function ShortcodeAmazon() {
if ( !function_exists('add_shortcode') ) return; // Register the shortcodes
add_shortcode('amazon', array(&$this, 'amazon_ausgeben_handler'));
}

function aws_signed_request($region, $params, $public_key, $private_key) {
/* Parameters: $region - the Amazon(r) region (ca,com,co.uk,de,fr,jp)
$params - an array of parameters, eg. array("Operation"="ItemLookup",
"ItemId"=>"B000X9FLKM", "ResponseGroup"=>"Small")
$public_key - your "Access Key ID"
$private_key - your "Secret Access Key"
*/

// some paramters
$method = "GET";
$host = "webservices.amazon.".$region;
$uri = "/onca/xml";

// additional parameters
$params["Service"] = "AWSECommerceService";
$params["AWSAccessKeyId"] = $public_key;
// GMT timestamp
$params["Timestamp"] = gmdate("Y-m-d\TH:i:s\Z");
// API version
$params["Version"] = "2011-08-01";
// sort the parameters
ksort($params);
// create the canonicalized query
$canonicalized_query = array();
foreach ($params as $param=>$value)
{
$param = str_replace("%7E", "~", rawurlencode($param));
$value = str_replace("%7E", "~", rawurlencode($value));
$canonicalized_query[] = $param."=".$value;
}
$canonicalized_query = implode("&", $canonicalized_query);
// create the string to sign
$string_to_sign = $method."\n".$host."\n".$uri."\n".$canonicalized_query;
// calculate HMAC with SHA256 and base64-encoding
$signature = base64_encode(hash_hmac("sha256", $string_to_sign, $private_key, True));
// encode the signature for the request
$signature = str_replace("%7E", "~", rawurlencode($signature));
// create request
$request = "http://".$host.$uri."?".$canonicalized_query."&Signature=".$signature;
//return $request;
// do request
//$response = file_get_contents($request);
//***************************************************
$session = curl_init($request);
curl_setopt($session, CURLOPT_HEADER, false);
curl_setopt($session, CURLOPT_RETURNTRANSFER, true);
$response = curl_exec($session);
curl_close($session);
//***********************************
if ($response === False)
{
return False;
}
else
{
// parse XML
$pxml = simplexml_load_string($response);
if ($pxml === False)
{
return False; // no xml
}
else
{
return $pxml;
}
}
}

function amazon_ausgeben_handler ($atts, $content=null) {

extract(shortcode_atts(
array('asin'   => ''),$atts));
if ($asin==false) return;
$params=array("Operation"=>"ItemLookup", "ItemId"=>$asin, "ResponseGroup"=>"Large","AssociateTag"=>"your Amazon associate Tag");
$public_key='your public Amazon IDKey';
$private_key='your secret Amazon Key';
$region="de";
$xml_ret=$this->aws_signed_request($region, $params, $public_key, $private_key);
if ($xml_ret===False) return;
$myTitle = $xml_ret->Items->Item->ItemAttributes->Title;
$myImage = $xml_ret->Items->Item->MediumImage->URL;
return;
}
}
// Start this plugin once all other plugins are fully loaded
add_action( 'plugins_loaded', create_function( '', 'global $ShortcodeAmazon; $ShortcodeAmazon = new ShortcodeAmazon();' ) );
?>

AssociateTag, Keys und die Region werden in die Zeilen 96-99 eingetragen.
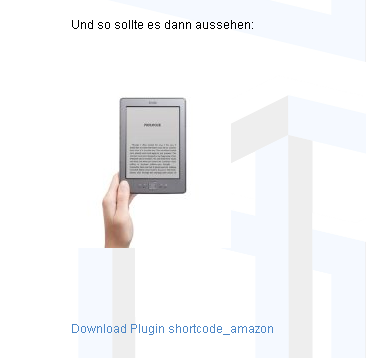
Aufgerufen wird das Plugin so: [ amazon asin=B0051QVF7A ] (ohne die Blancs hinter und vor den eckigen Klammern).Die asin ist die amazon standard identification number

Und so sollte es dann aussehen:

Hier kann man das Plugin downloaden Download Plugin shortcode_amazon